About GNU Radio
GNU Radio is one of the primary tools used for studying, decrypting, and generating radio communications. GNU Radio is both a Python library and graphical front end for generating python radio programs. Users create programs by dragging blocks onto a workspace and connecting block outputs into block inputs. To introduce ourselves to the basics of the software, the goal of this project will be create a simple tone generator.
Installing GNU Radio
GNU Radio can be downloaded from the GNU Radio website or through your operating system’s package manager.
Visit the GNU Radio Wiki for detailed install instructions: https://wiki.gnuradio.org/index.php/WindowsInstall
Download the 64 bit Windows installer and run it.
Visit the GNU Radio Wiki for detailed install instructions: https://wiki.gnuradio.org/index.php/MacInstall
Use the MacPorts to install the gnuradio package.
Run the following commands:
$ sudo add-apt-repository ppa:gnuradio/gnuradio-release
$ sudo apt update
$ sudo apt install gnuradio
More information can be found at the GNU Radio Wiki: https://wiki.gnuradio.org/index.php/UbuntuInstall
Starting GNU Radio Companion
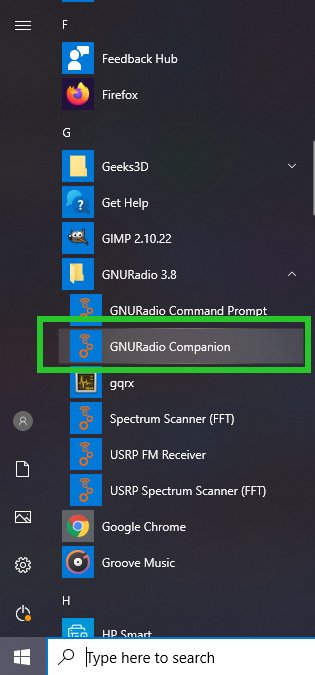
GNU Radio Companion is the GUI programming environment that will let us drag and drop components to create our program. GNU Radio Companion will be in the Windows Start Menu and can be started by running “gnuradio-companion” on Unix-like operating systems.
Getting Started
When you start GNU Radio Companion, you will will be greeted with the following window. Let’s take a look.

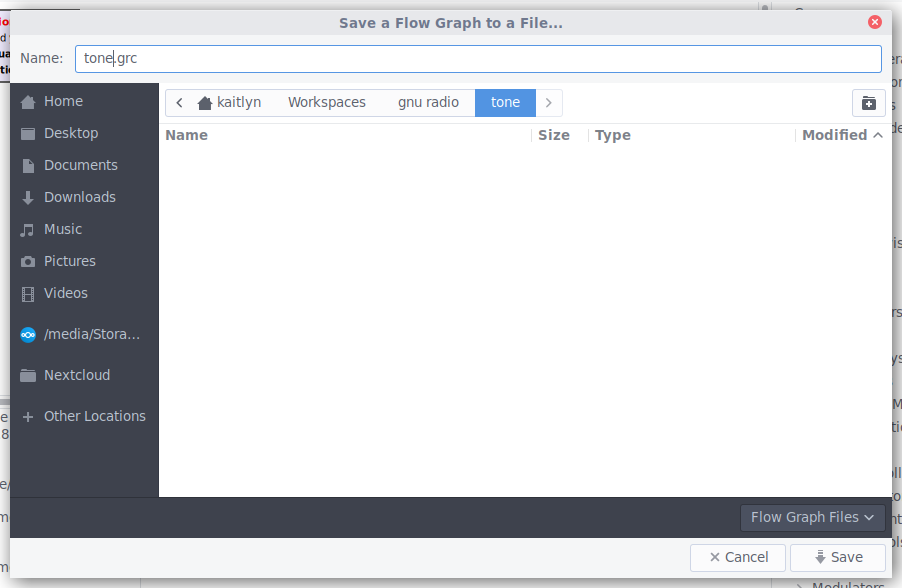
To start, let’s go to File -> Save As and save our new project in its own folder as tone.grc.
Creating a Tone
Let’s start by double clicking on the “Options” block and set some basic options about the project.
In the Properties window, you might notice that the ID property is in red. In GNU Radio, red labels indicate an error. Saving the project first may have eliminated this error. However, in this case, the id of the project is “default” which is a problem. A description of the problem is in the lower half of the properties window. The issue is that the name “default” is not allowed.
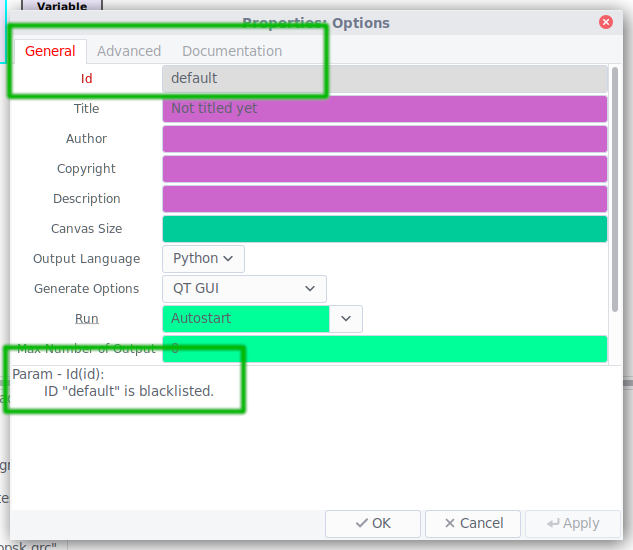
Let’s change the Id to “tone” and click the OK button.
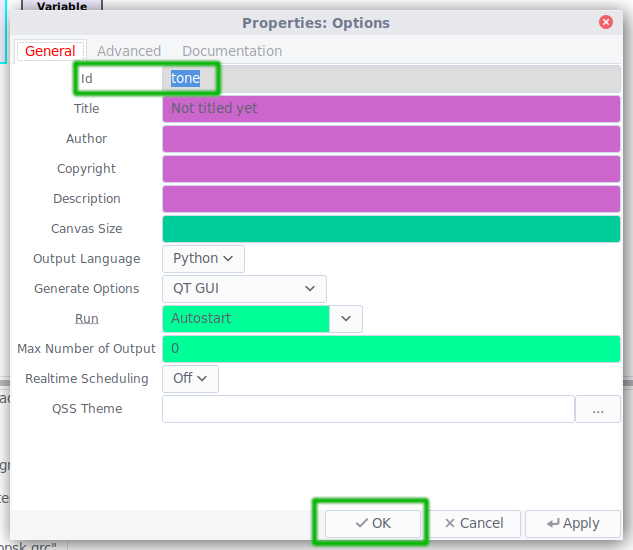
You should no longer see any red text in the two blocks on the main work area.
Generate a Tone
From the list of blocks, drag the Waveform Generators -> Signal Source into the workspace.

Double click on the Signal Source block to open up the properties. Change the output type to “Float” and the frequency to 261.626. The frequency, 261.626 Hz is the frequency of middle c.

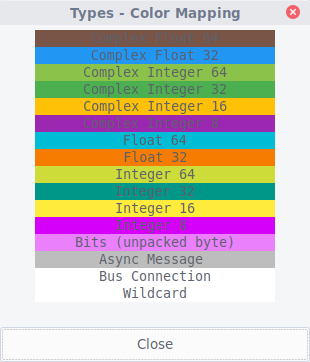
GNU Radio often uses the following input/output types:
- Complex: Complex numbers contain a real and imaginary component. This is used primarily for SDR I/Q data.
- Float: 32 bit floating point numbers.
- Int: 32 bit signed integers.
- Short: 16 bit signed integers.
- Byte: 8 bit signed integers often used to represent raw data.
Note that the data type of the output of a block needs to match the input of the block it is connected to. Therefore, a block that outputs bytes can only connect to blocks that input bytes. The color of the output/input of blocks represent the data types.
A list of data types and their colors can be viewed if you go to Help -> Types.
Drag the Audio -> Audio Sink block into the workspace. The Audio Sink block connects an input to your computer’s sound system.

Click and drag from the “out” of the Signal Source to the “In” of the Audio Sink. This will connect the output of the Signal Source to the Audio Sink.

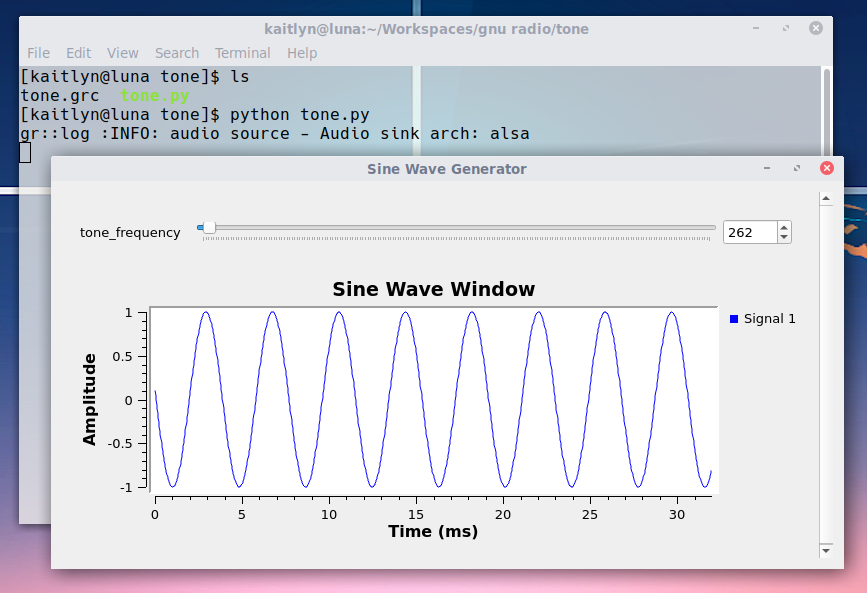
Save the project, and press the “Execute the Flow Graph” button. You should hear a tone. Congratulations, you just created your first GNU Radio program. Press the “Kill the Flow Graph” to stop the annoying tone.

View the Waveform
Drag the Instrumentation -> QT -> QT GUI Time Sink onto the flow graph.
Double click on the QT GUI Time Sink to open the properties. Set the type from “Complex” to “Float.” Click OK.
Connect the output of the Signal Source to the input of the QT GUI Time Sink.
Push the “Execute Flow Graph” button, and now you will notice that there will be a window showing the sine wave generated by the Signal Source.

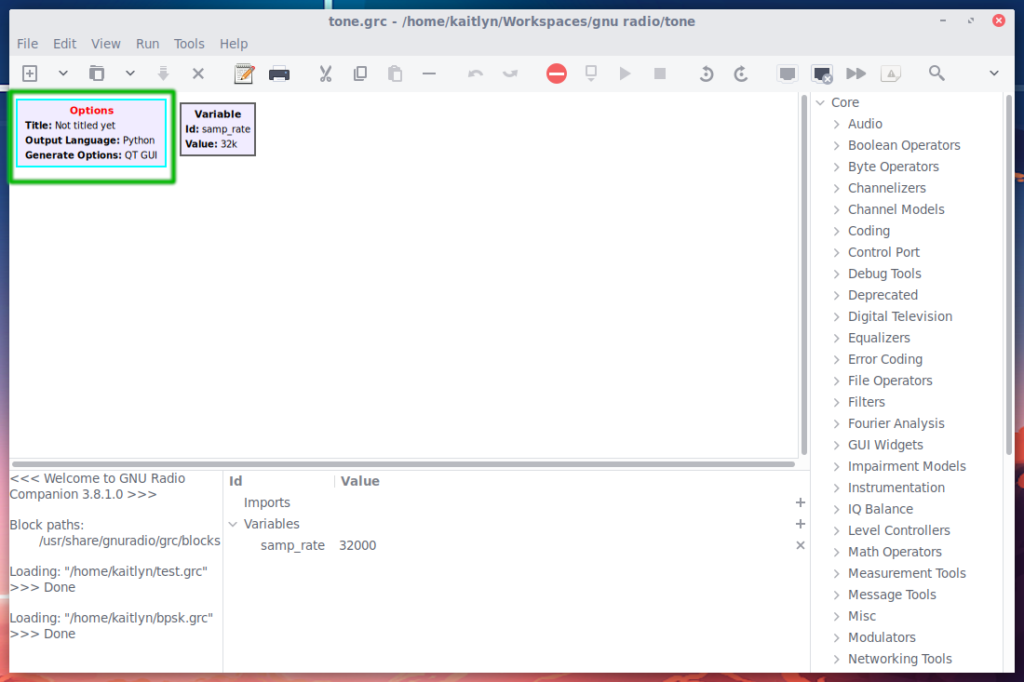
Flag 1
The first flag is the text under the green box in the screenshot above.
Controlling the Frequency
Drag the GUI Widgets -> QT -> QT GUI Range anywhere on the flow chart.
Double click on the QT GUI Range to open the properties.
Set the Id to “tone_frequency” no quotes.
Set the Default Value to 261.626.
Set the Start to 10.
Set the Stop to 20000.
Set the Step to 10.
Press the OK button.

Double click on the Signal Source block to bring up the properties.
Set the Frequncy to “tone_frequency” no quotes. Press OK.

Execute the flow chart, and now you change the frequency of the tone using a slider.

The Python Output
In a command line console, navigate to the folder where you saved tone.grc. You will notice that there is a python file called “tone.py” there too. Run “tone.py” by executing the following:
$ python tone.py
You will get the same tone generator window you made before.
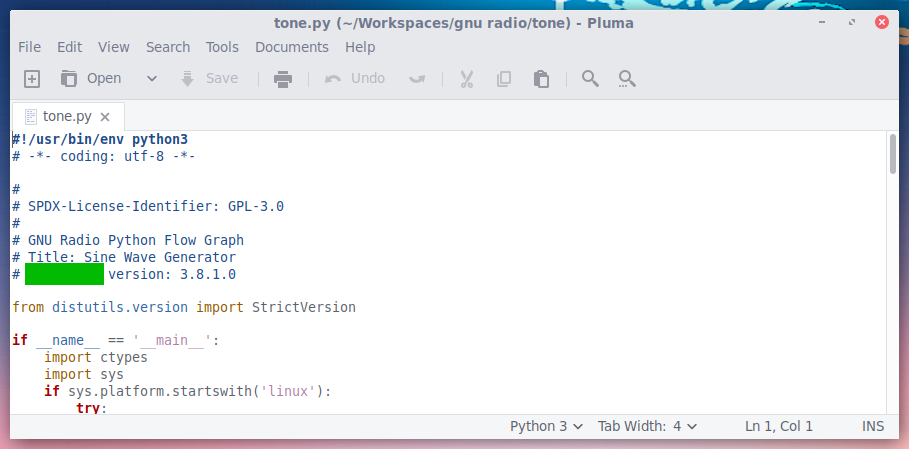
Flag 2
Open the python file (tone.py) in a text editor. There are comments at the top of the Python script. The flag is the text under the green box in the screenshot below.